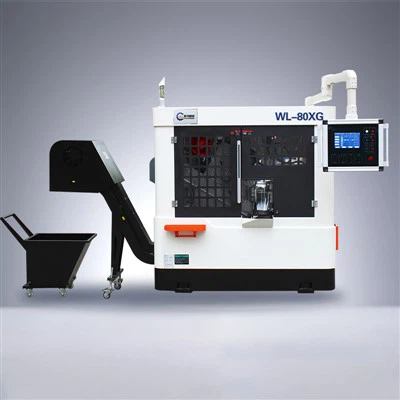
Rip - cutting is a fundamental woodworking operation that involves cutting a piece of wood parallel to the grain. When it comes to performing rip - cutting, a Circular Low Saw can be an excellent tool. As a Circular Low Saw supplier, I am here to share comprehensive insights on how to perform rip - cutting with a Circular Low Saw effectively and safely.
Understanding the Circular Low Saw
Before delving into the rip - cutting process, it's crucial to understand the Circular Low Saw. A Circular Low Saw is a versatile power tool that consists of a circular blade mounted on a spindle and driven by an electric motor. The blade rotates at high speed, enabling it to cut through various materials, including wood, plastic, and even some metals. Its low - profile design makes it ideal for precision cutting in tight spaces.
Preparing for Rip - Cutting
Safety First
Safety should always be your top priority when using any power tool, including a Circular Low Saw. Here are some essential safety measures to follow:
- Wear Protective Gear: Put on safety glasses to protect your eyes from flying debris, ear protection to reduce noise exposure, and a dust mask to prevent inhalation of sawdust.
- Inspect the Saw: Before use, carefully examine the Circular Low Saw for any signs of damage or wear. Check the blade for sharpness and proper installation. Make sure all safety guards are in place and functioning correctly.
- Clear the Work Area: Remove any clutter or obstacles from your work area to prevent tripping hazards. Ensure that the work surface is stable and level.
Selecting the Right Blade
The choice of blade is crucial for achieving clean and accurate rip - cuts. For rip - cutting wood, a blade with fewer teeth (e.g., 24 - 30 teeth) is generally recommended. These blades are designed to remove material quickly and are less likely to cause tear - out. Make sure the blade is compatible with your Circular Low Saw and has the appropriate arbor size.
Setting Up the Saw
- Adjust the Blade Height: Set the blade height so that it protrudes about 1/8 to 1/4 inch above the workpiece. This will ensure a clean cut without excessive strain on the saw.
- Align the Fence: The fence is a guide that helps you make straight rip - cuts. Align the fence parallel to the blade, ensuring that it is at the correct distance from the blade for the desired cut width. Use a measuring tape or a combination square to make precise adjustments.
Performing the Rip - Cut
Marking the Workpiece
Before making the cut, mark the cutting line on the workpiece using a pencil or a marking gauge. This will help you stay on track and ensure a straight cut.
Feeding the Workpiece
- Position the Workpiece: Place the workpiece firmly against the fence with the marked cutting line aligned with the blade. Hold the workpiece securely with both hands, keeping your fingers away from the blade.
- Start the Saw: Turn on the Circular Low Saw and allow the blade to reach full speed before starting the cut.
- Feed the Workpiece Slowly: Push the workpiece steadily and slowly towards the blade, following the marked cutting line. Avoid applying too much pressure, as this can cause the blade to bind or kick back.
Maintaining Control
- Keep a Steady Pace: Maintain a consistent feed rate throughout the cut to ensure a smooth and even cut. If the saw starts to bog down, reduce the feed rate.
- Monitor the Cut: Pay close attention to the cut as it progresses. If you notice any signs of tear - out or unevenness, stop the saw and make the necessary adjustments.
Finishing the Cut
Completing the Cut
Once the workpiece has passed through the blade completely, continue pushing it forward until it clears the blade. Do not release the workpiece until it is safely past the blade.
Turning Off the Saw
After completing the cut, turn off the Circular Low Saw and wait for the blade to come to a complete stop before removing the workpiece.


Troubleshooting Common Issues
Tear - Out
Tear - out occurs when the wood fibers are ripped out instead of being cleanly cut. To minimize tear - out, use a sharp blade, reduce the feed rate, and support the workpiece properly. You can also use a backer board or a zero - clearance insert to provide additional support.
Binding
Binding happens when the blade gets stuck in the workpiece. This can be caused by a dull blade, incorrect blade height, or excessive pressure. To prevent binding, make sure the blade is sharp, set the blade height correctly, and feed the workpiece slowly and steadily.
Kick - Back
Kick - back is a dangerous situation where the workpiece is suddenly thrown back towards the operator. It can be caused by a dull blade, incorrect blade alignment, or improper feeding. To avoid kick - back, use a sharp blade, align the blade correctly, and always keep your hands away from the path of the blade.
Conclusion
Performing rip - cutting with a Circular Low Saw requires careful preparation, proper technique, and a commitment to safety. By following the steps outlined in this blog, you can achieve clean, accurate, and safe rip - cuts. As a Circular Low Saw supplier, we offer a wide range of high - quality Circular Low Saws, including the Automatic Circular Saw, Automatic stainless steel circular saw machine, and Automatic Circular Saw Cutting Metal Machine. If you are interested in purchasing a Circular Low Saw or have any questions about rip - cutting, please feel free to contact us for further discussion and procurement negotiation.
References
- Woodworking Magazine. "Mastering Rip - Cutting with Circular Saws."
- Power Tool Handbook. "Circular Saw Operations and Safety."
- Manufacturer's Manual for Circular Low Saws.